How to Extract Textures and Assets from Any Game for Study (Step-by-Step RenderDoc Tutorial)
“Learn how to extract textures, sprites, and 3D models from games running on PC, Android, or Nintendo Switch using RenderDoc. Discover how to inspect Draw Calls, understand graphics rendering, and optimize your projects in Unity or other engines by capturing directly from the GPU.”
🛑 Danger
⚠️ Important Ethics and Copyright Warning
This entire asset extraction process must be used EXCLUSIVELY FOR STUDY, LEARNING, AND DEBUGGING. You must NEVER reuse, sell, or publish textures, 3D models, sprites, or fonts extracted from other games in your own commercial projects. Respect the hard work and copyrights of the artists and studios in the industry.
How to Extract Game Textures and Assets for Study Using RenderDoc (Step-by-Step Tutorial)
As a GameDev, every game we play ultimately becomes a real classroom. It's almost impossible not to observe the composition of the graphics, the special particle effects, and catch yourself thinking: "How was this graphic put together? What technique did they use to achieve this effect?"
Especially for those on a learning journey, there's no better school than using our favorite games as a reference and trying to reproduce something similar — or, who knows, even improving the technique.
💡 The Programmer's Dilemma: Those focused on programming know all too well how much a good piece of art is missed during testing. Many times I found myself wishing I had access to the textures and assets of a specific game just to experiment, create prototypes, and validate mechanics before having the final art for my own project. It gets much easier to understand the engineering of a visual effect when you have access to the puzzle pieces.
The Challenge of Extracting Game Assets (Unity, Unreal, etc.)
Here we hit a major roadblock: most game engines pack their art assets in a highly performance-optimized way, often adding layers of protection that make extraction (the famous asset ripping) quite difficult.
Although there are several tools on the internet focused on unpacking files from specific engines, the reality is that:
- Not all of them work on the engines' latest versions.
- Many games have custom encryption or extra layers of protection.
- The process is tedious and frequently results in corrupted files.
But, thinking about the architecture of how game rendering works, I came to a logical conclusion: regardless of the protection scheme, with the game running, at some point these textures must be sent to the Video Card memory (VRAM).
At the very end of the graphics pipeline, they will be decrypted, open, and ready to be rendered on the screen. What if there was a way to "intercept" the video card at the exact moment of use and capture these textures?
After a lot of research, I found the ultimate tool for graphics debugging and frame capturing: RenderDoc.
What is RenderDoc and how does it capture graphics?
RenderDoc is a phenomenal open-source graphics debugger aimed at developers.
"RenderDoc is a free MIT licensed stand-alone graphics debugger that allows quick and easy single-frame capture and detailed introspection of any application using Vulkan, D3D11, OpenGL & OpenGL ES or D3D12 across Windows, Linux, Android, or Nintendo Switch™."
In short: it allows you to capture a single frame of the game and inspect absolutely everything the GPU had to process to draw that screen, allowing you to extract images, spritesheets, and even 3D meshes in real-time.
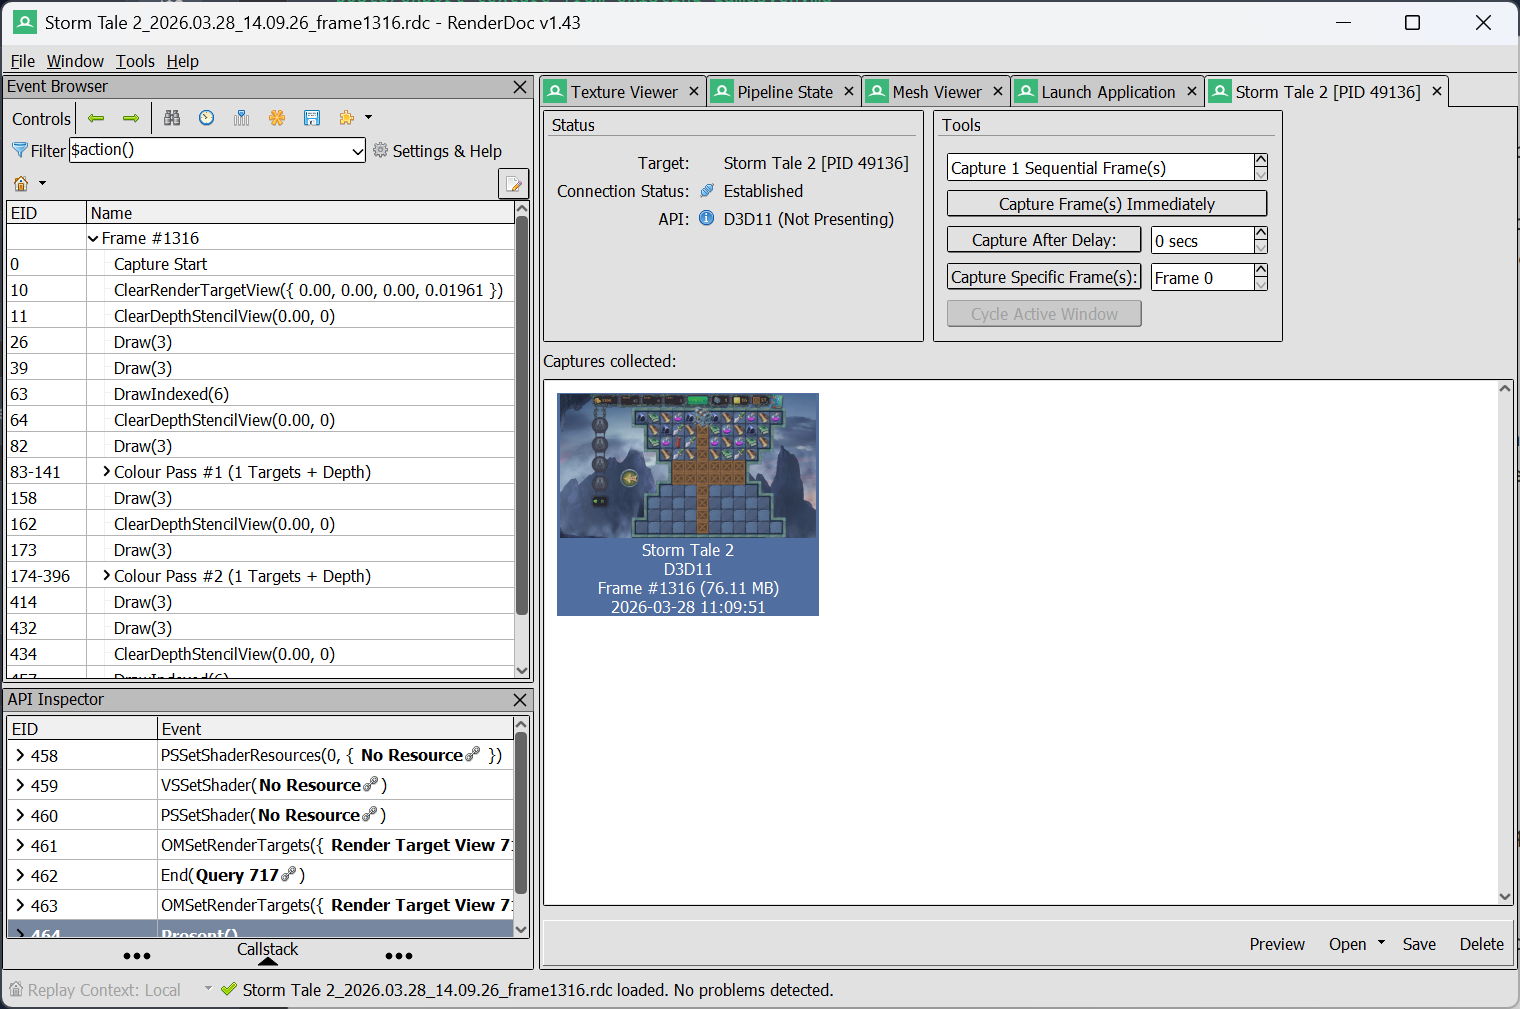
Step-by-Step: Installing and Capturing Textures
Let's get our hands dirty. The process for inspecting graphics is surprisingly simple:
- Launch RenderDoc and go to the
Launch Applicationtab. - Configure the Executable Path field pointing to the
.exefile of the game you want to "spy" on. - Click the Launch button. This will open the game with the capture code injected.
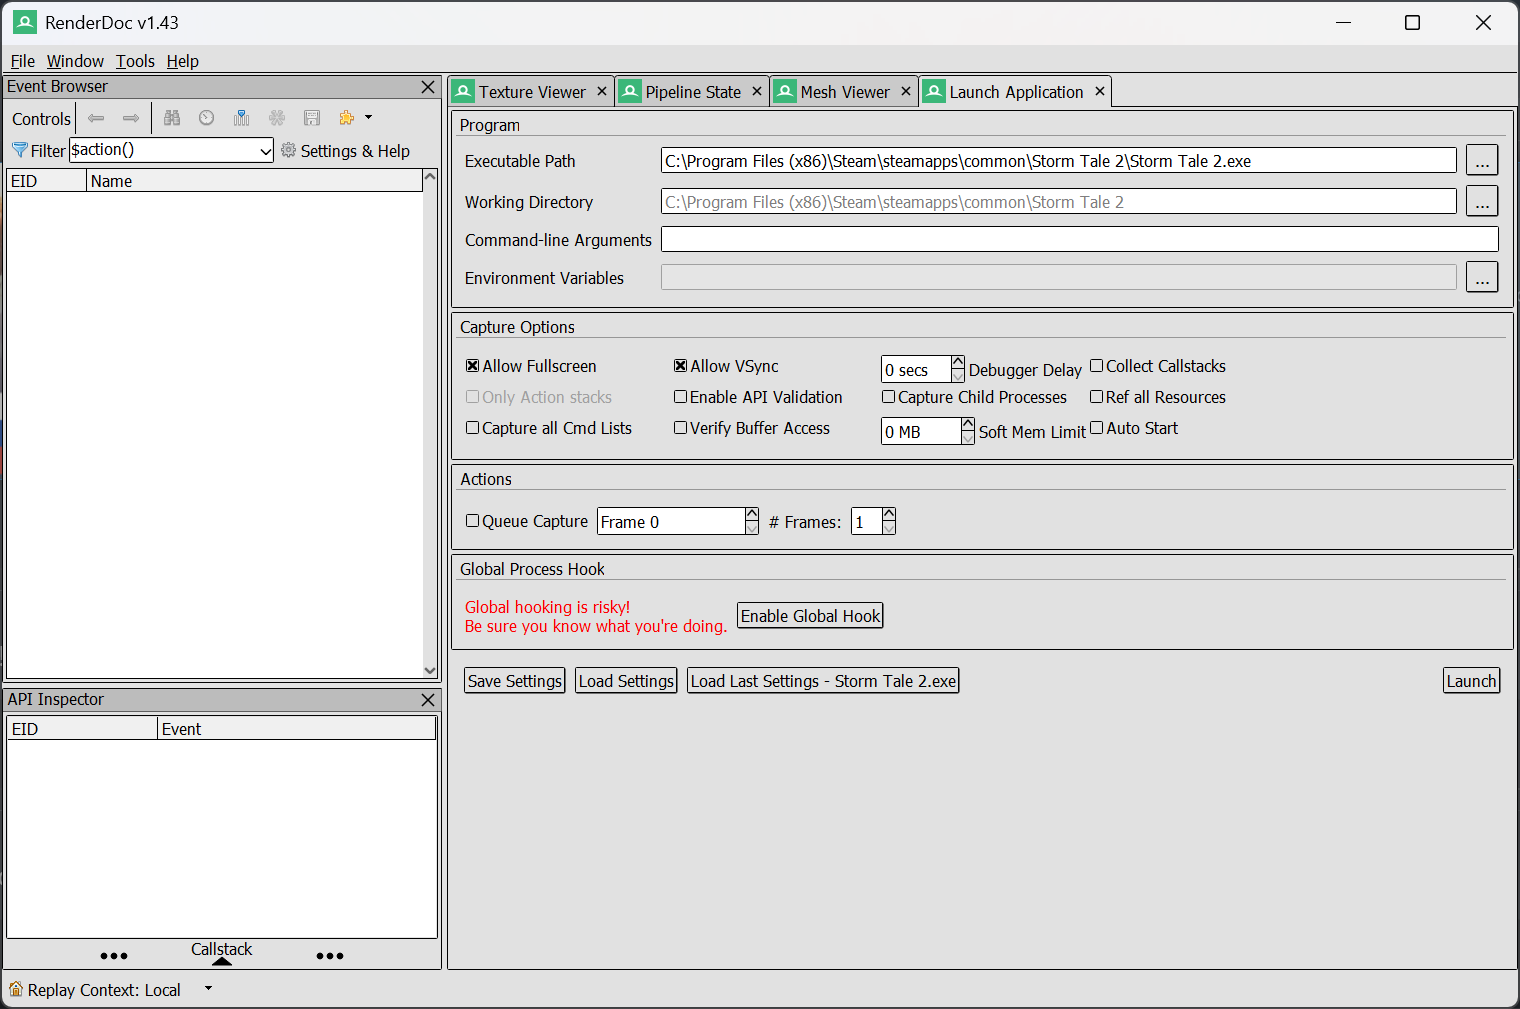
For this tutorial on how to view a game's art, we'll use a project of mine from Green Sauce Games, Storm Tale 2, but the process works for practically any title.
With the game running, navigate to the screen that contains the visual elements or effects you're curious to analyze.
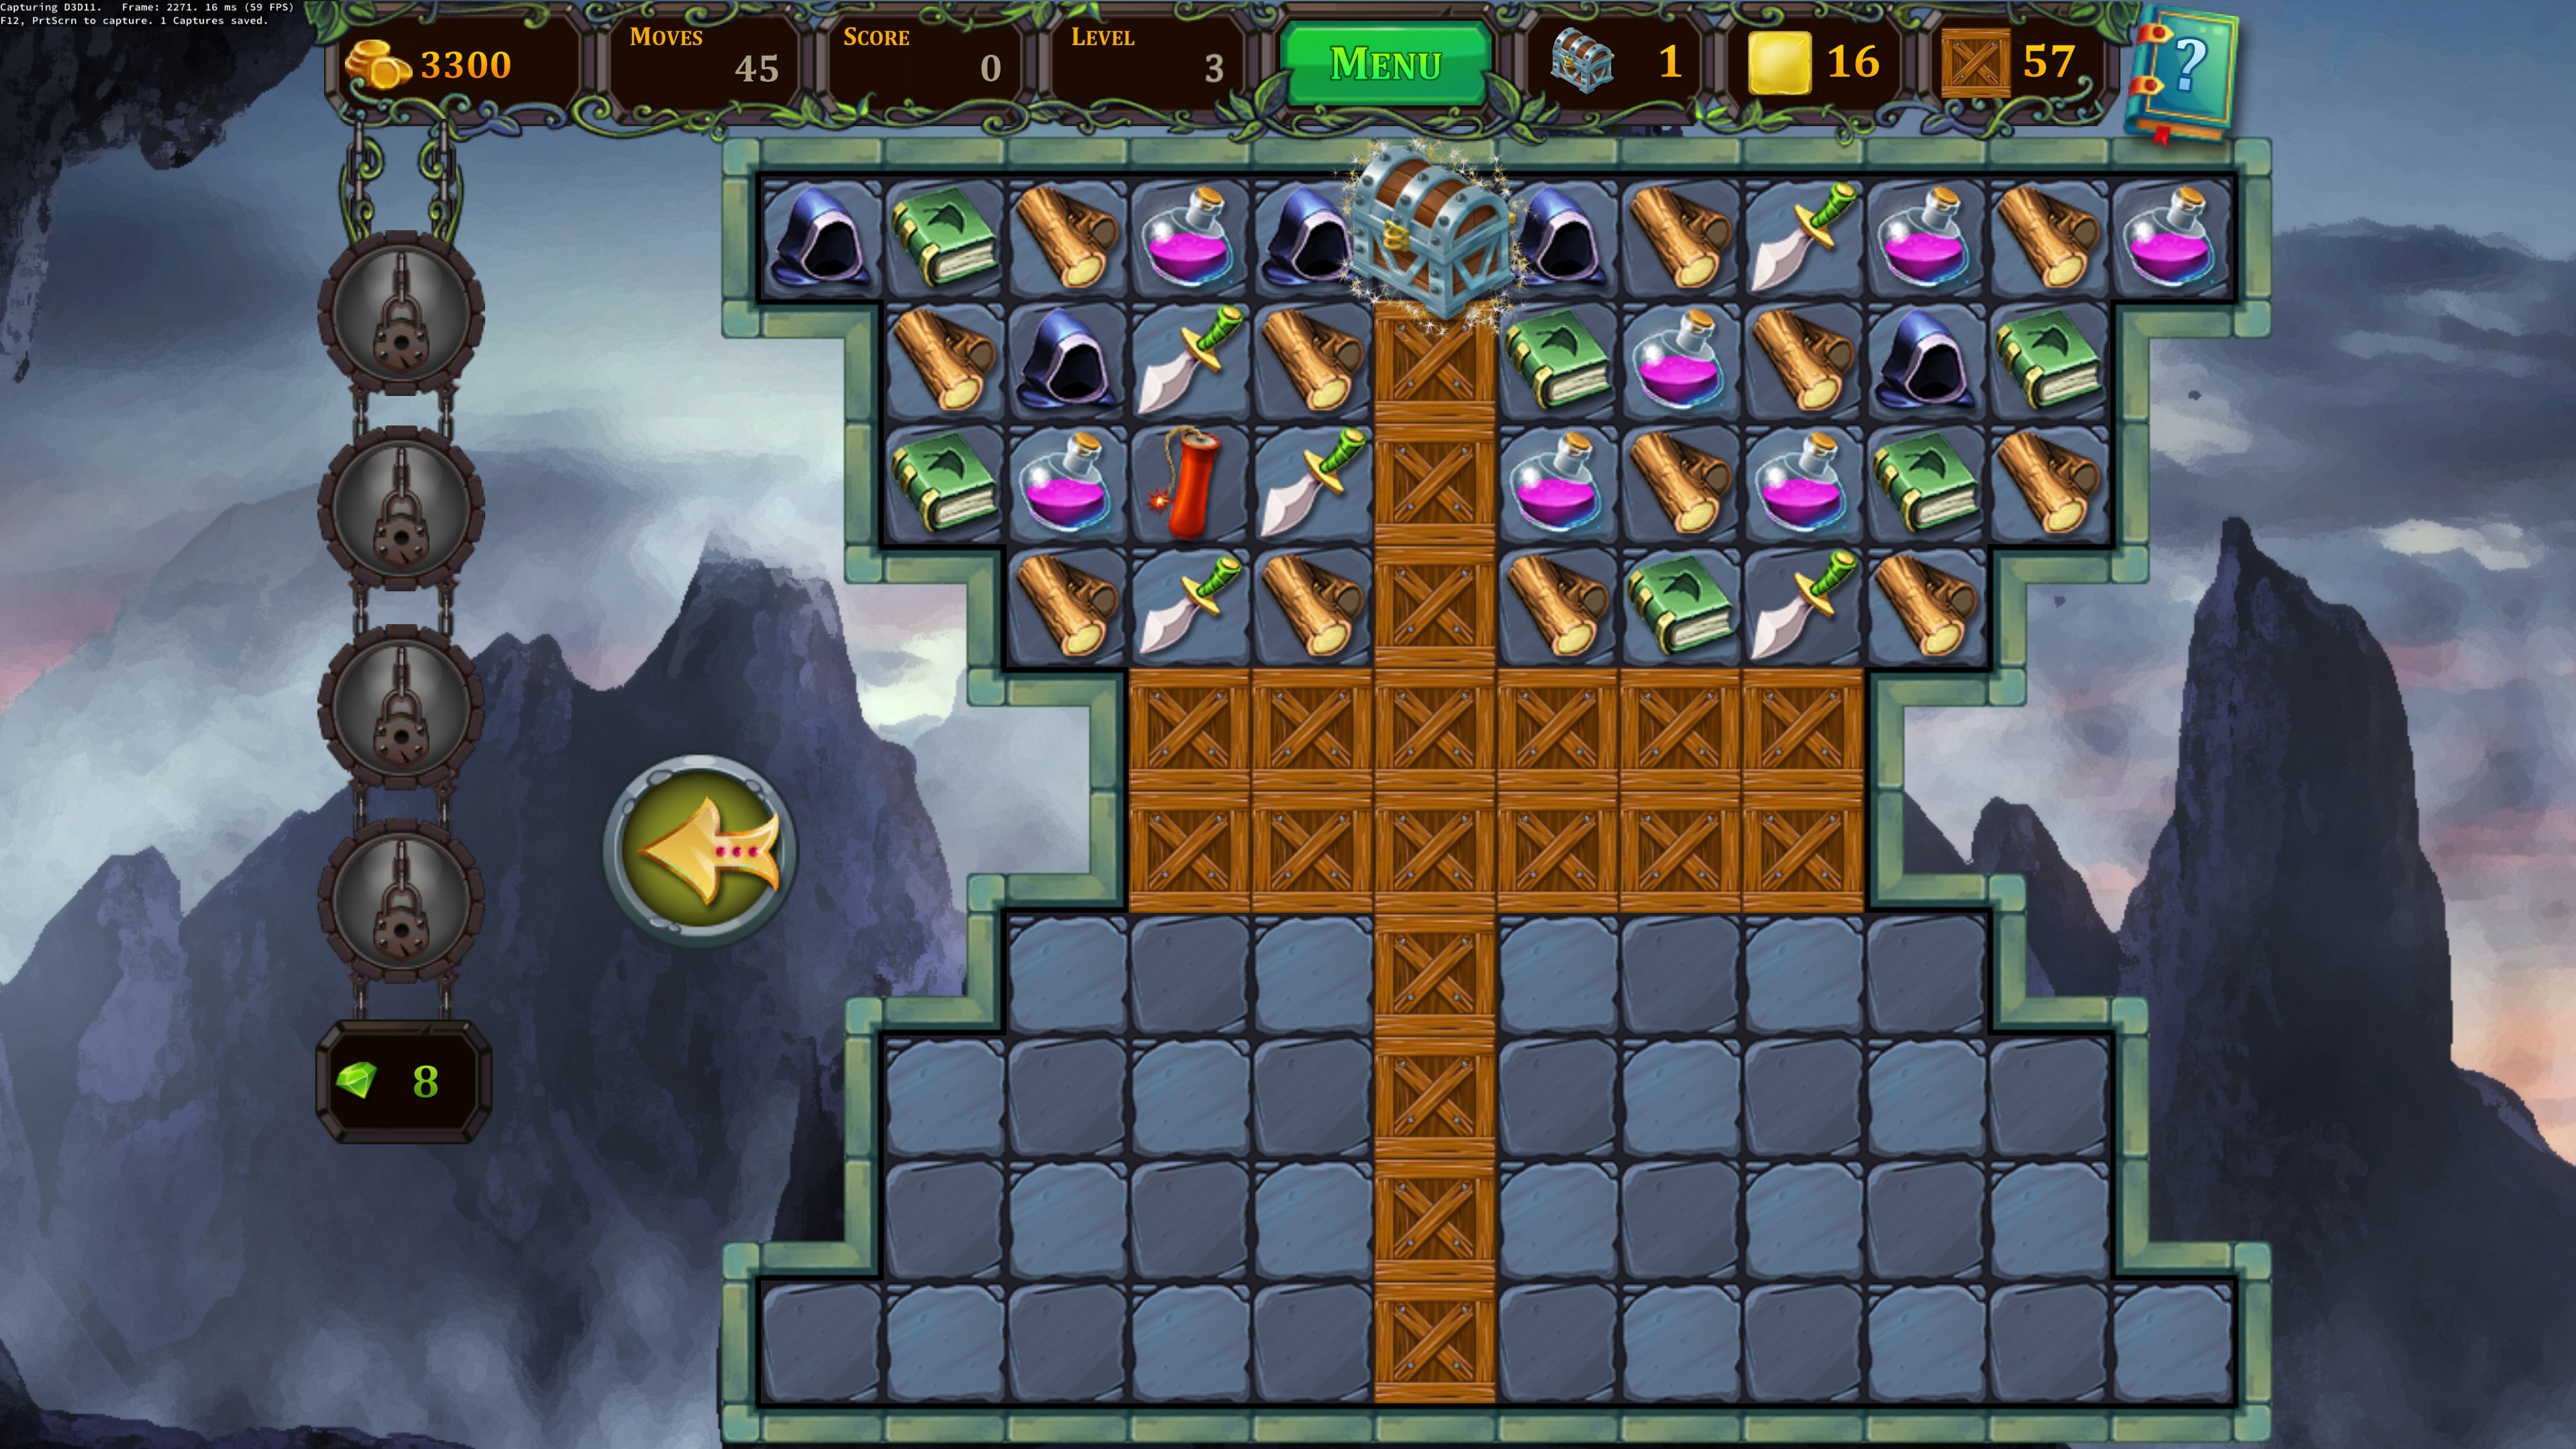
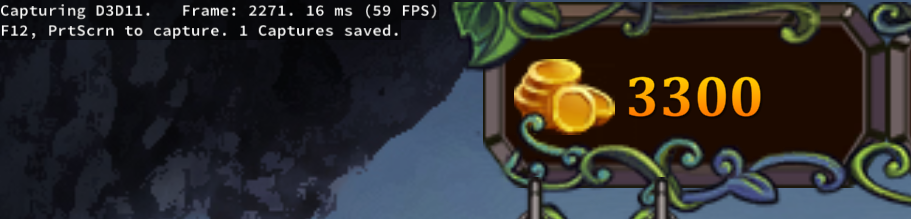
Notice that, in the upper-left corner of the game screen, a text overlay will appear (showing FPS and the graphics API). This means RenderDoc has successfully connected and is awaiting your commands.
At this moment, just press the F12 key. The game might freeze slightly for a second, which indicates that the complete capture of the frame and all its video assets has been performed.
Inspecting the Frame's Secrets: How to Find the Art Assets
Back to RenderDoc:
- Double-click the captured Frame that will appear on the main interface.
- Make sure the Texture Viewer tab is selected.
- On the left panel, look at the Event Browser.
The Event Browser is the heart of the tool. It lists, chronologically, every step, every Draw Call that the GPU executed to compose that frame, layer by layer.
By clicking on the Draw events, the magic happens: the exact texture used at that moment appears on the screen. Secrets exposed!
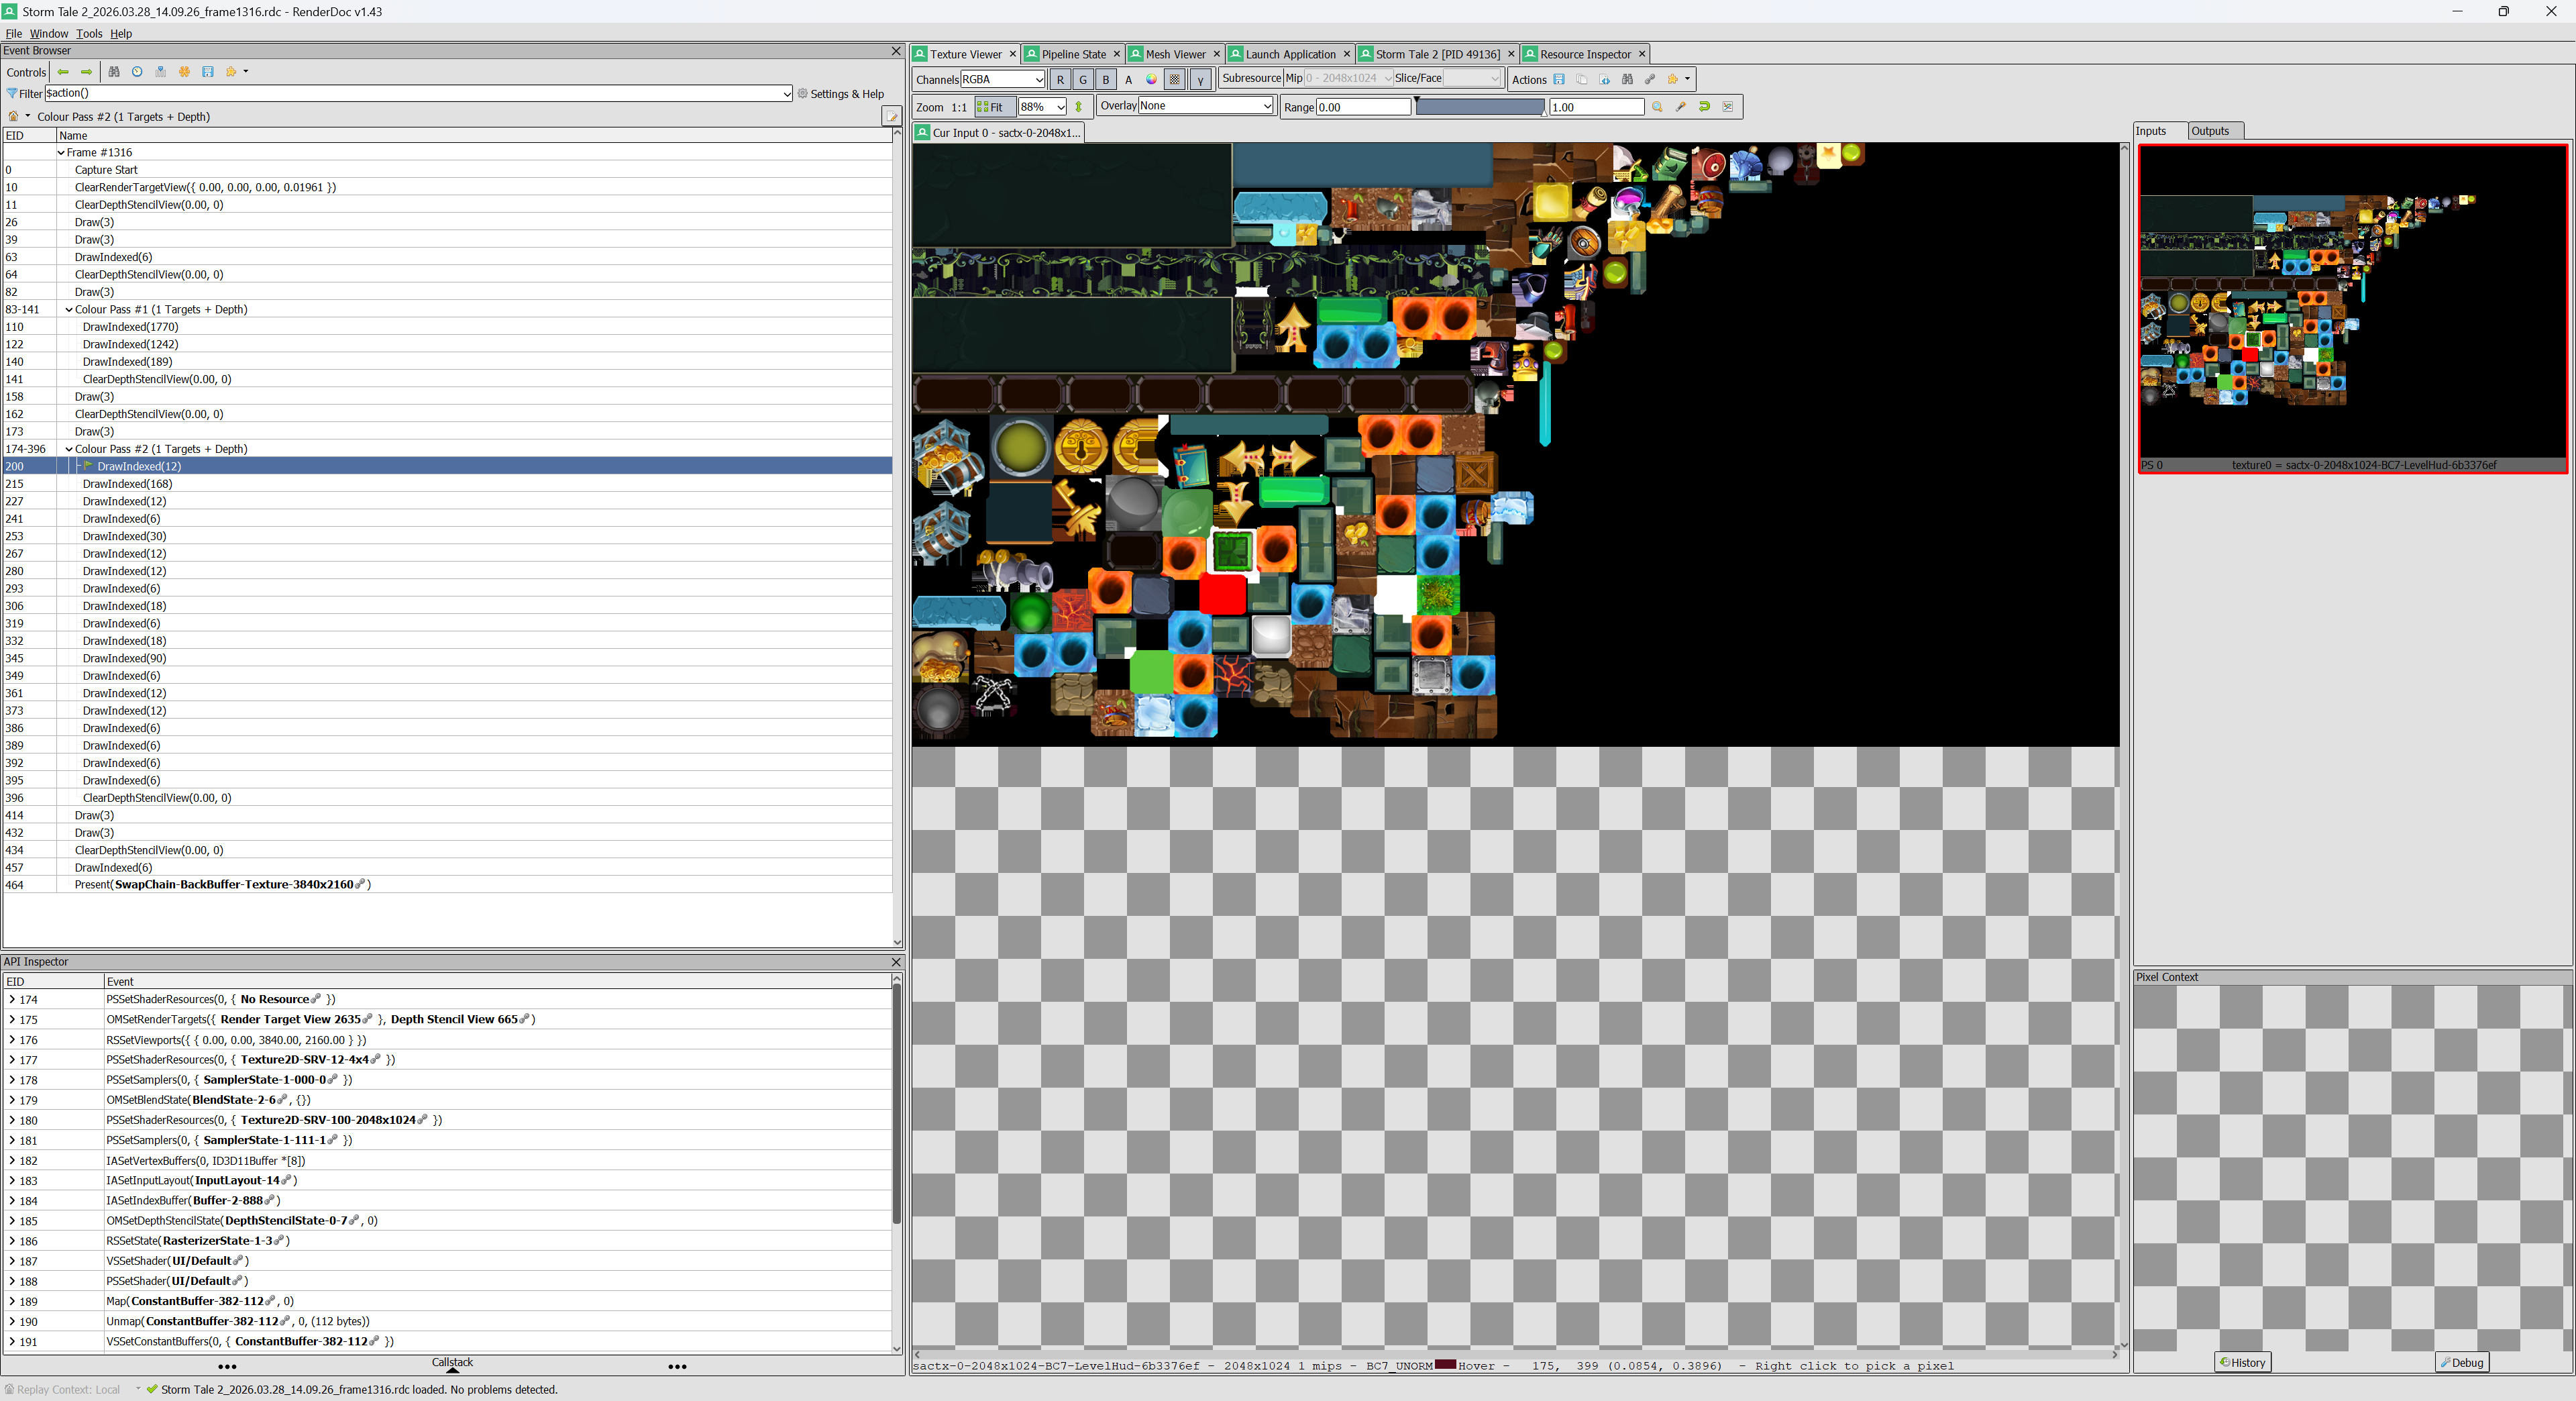
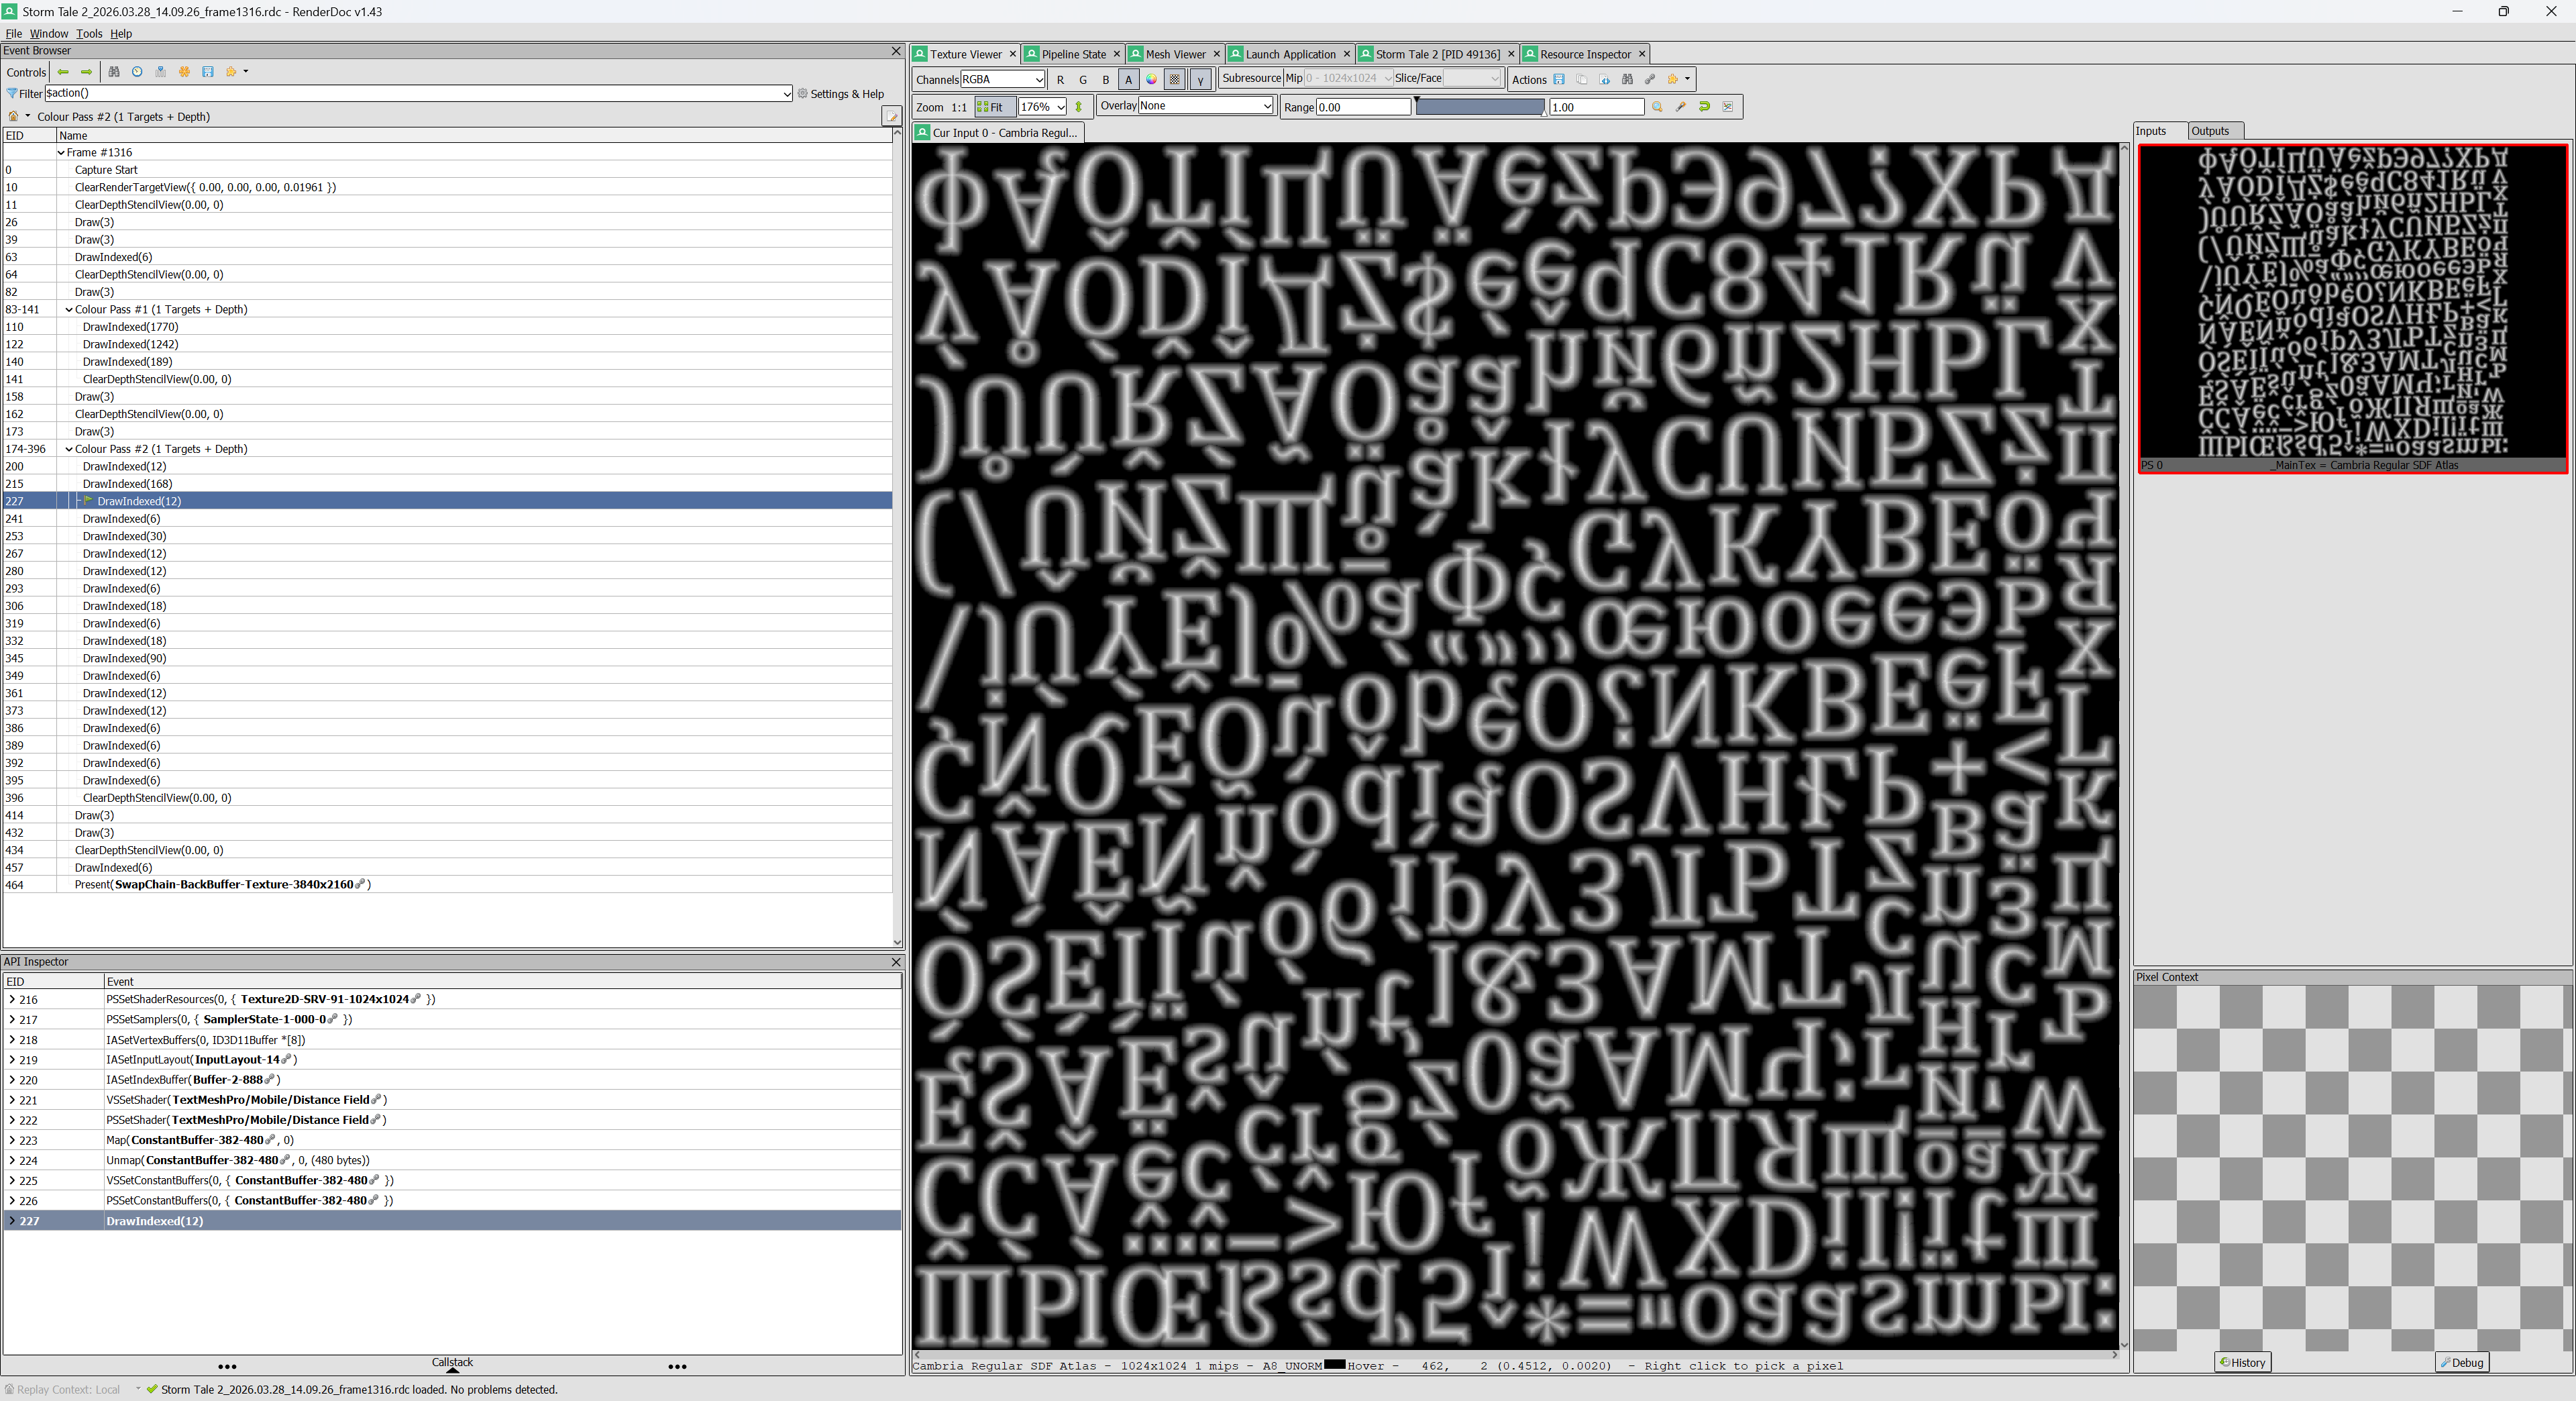
Absolutely everything that was rendered will be available there, from character sprites to the fonts used in the User Interface (UI) texts.
🛠️ Golden Optimization Tip for Unity (Draw Calls and Sprite Atlas)
Besides satisfying your curiosity about how to extract graphics, RenderDoc is a professional Debugging and Optimization tool.
The ideal scenario in game development is to build a scene with the minimum amount of Draw Calls possible. A Draw Call occurs whenever the CPU needs to tell the video card to "switch contexts" (change a texture, apply a new shader, etc.) to draw the next part of the scene.
- How to improve performance? It is highly recommended to pack your game's textures into Sprite Atlases.
- The Result: If your entire scene (or UI) consumes elements from a single Sprite Atlas and uses the same Material, you'll have only 1 Draw Call for everything, saving a lot of processing power and ensuring high FPS.
Engines like Unity have fantastic internal tools (like the Frame Debugger), but if you want to visually reverse-engineer how large commercial games solve batching and texture optimization problems, RenderDoc is the best way.
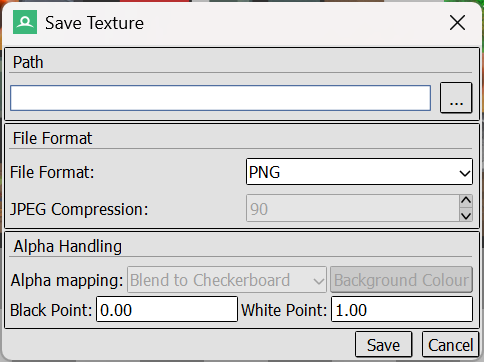
How to Save Extracted Textures as PNG
Found the sprite or texture you were looking for? Exporting it is very easy:
- Right-click the desired texture inside the Texture Viewer.
- Select Save Texture As.
- Choose the desired format (save as
.PNGor.DDS) and you're done!
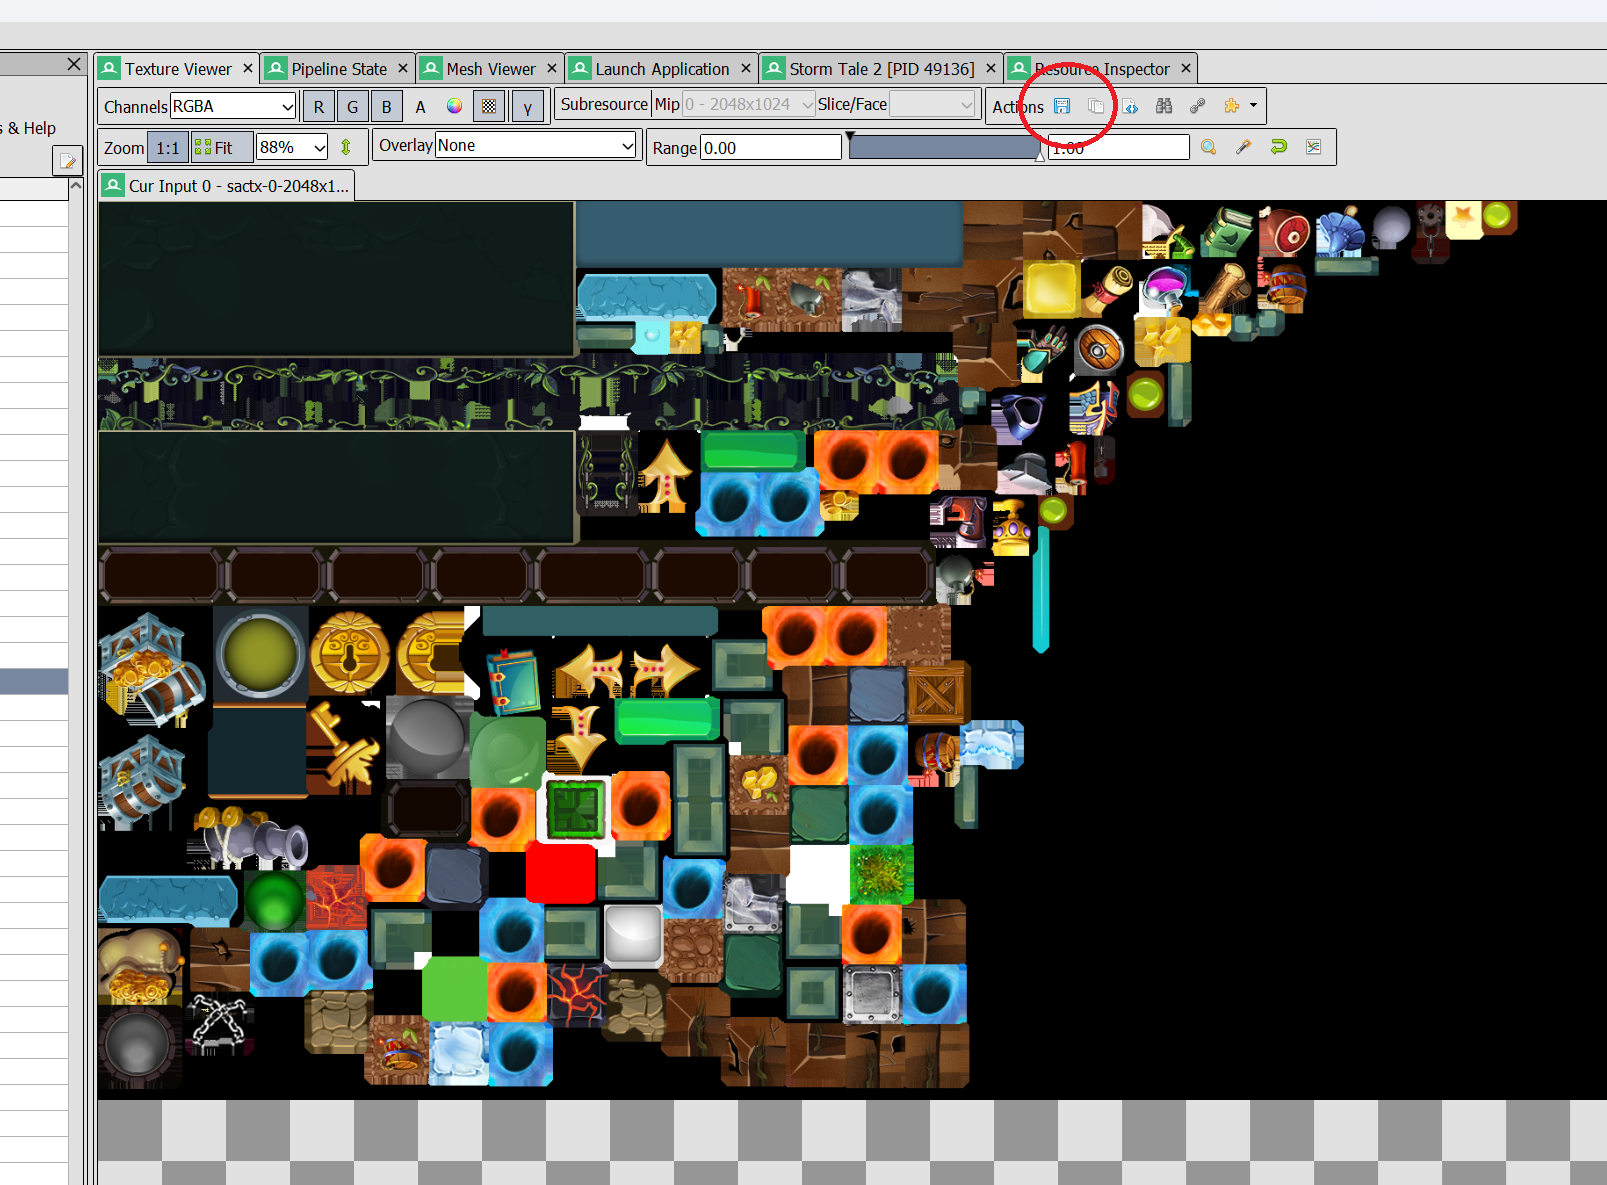
The textures are now on your computer, ready to be studied or used as temporary placeholders in your engine of choice.
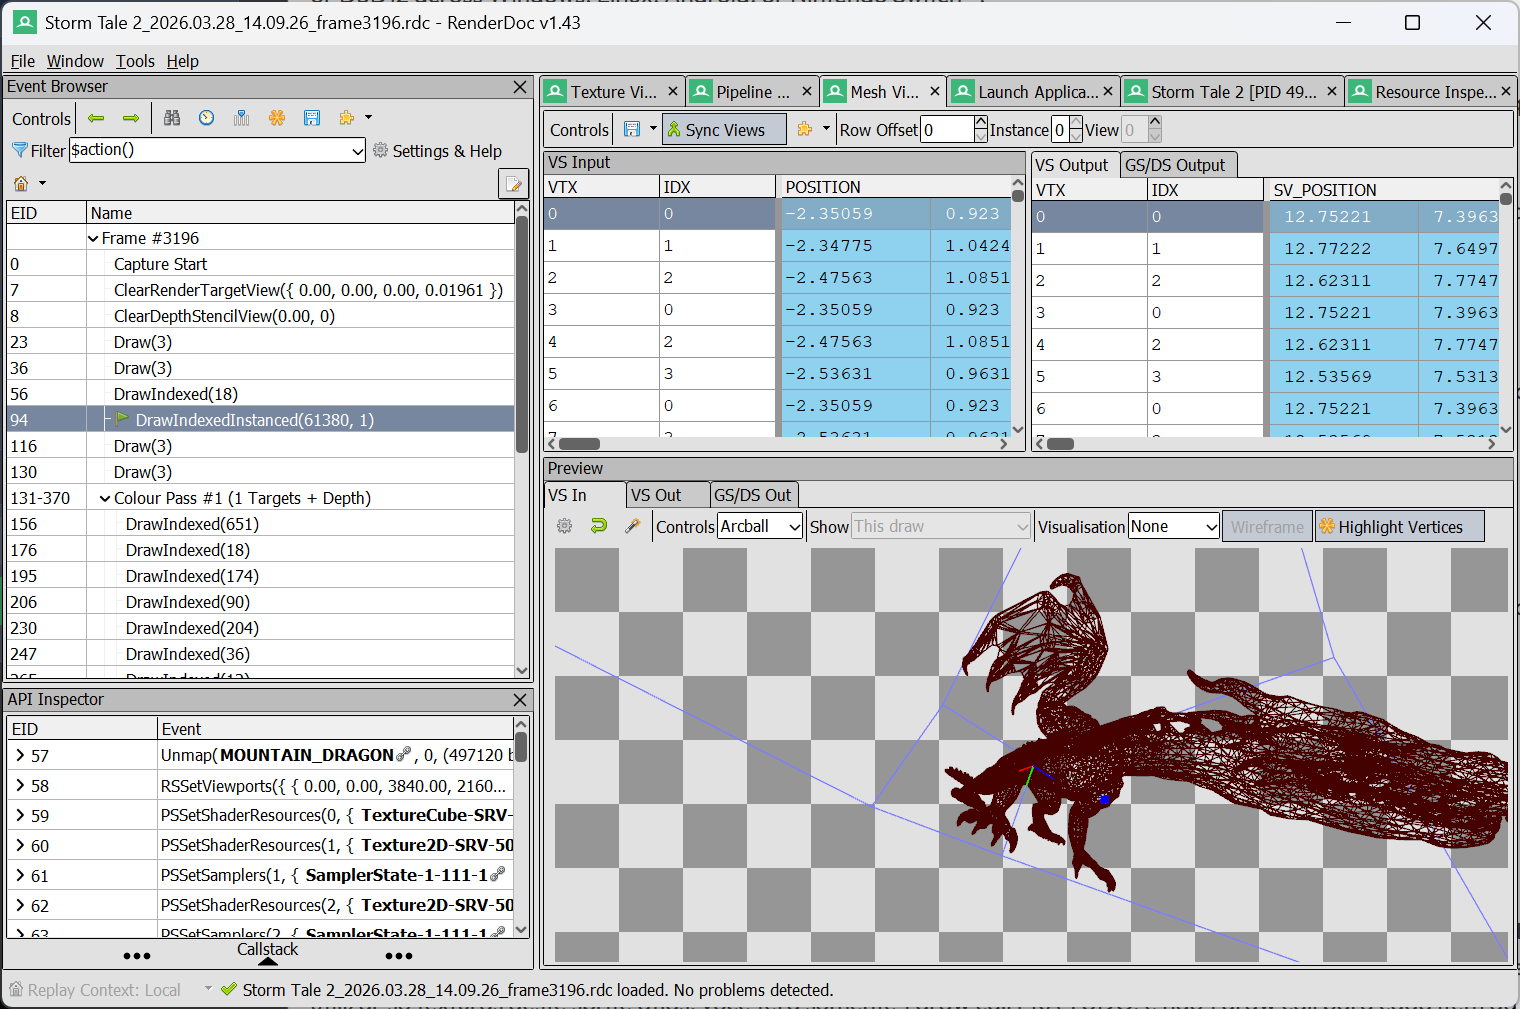
Advanced Features: Extracting 3D Models, Android, and Switch
RenderDoc's power isn't limited to conventional 2D PC games. For those looking for advanced game hacking techniques (in the educational sense of discovering how things work), it offers much more:
- Mobile Games and Consoles: It is possible to connect and extract data from games running on Android devices and even the Nintendo Switch (excellent for developers who already publish on consoles and have devkits).
- Extract 3D Models (Mesh Ripper): You can analyze not only 2D textures, but also view the Mesh Output tab. Curious to know if the Dragon that appears in Storm Tale 2's Main Menu was a 3D Mesh? Here you have the answer! RenderDoc allows you to spy on even the Meshes used in the scene, and view all the vertices in real-time!
What do you guys think? Is there a specific game you're dying to know how it was made and see the textures behind the scenes? Did this optimization and extraction tip help you in any way?
Let me know in the comments below! Happy GameDev! 🎮
Comments
Have a question, or found an issue with the code? Drop a comment below — I read and reply to every one.